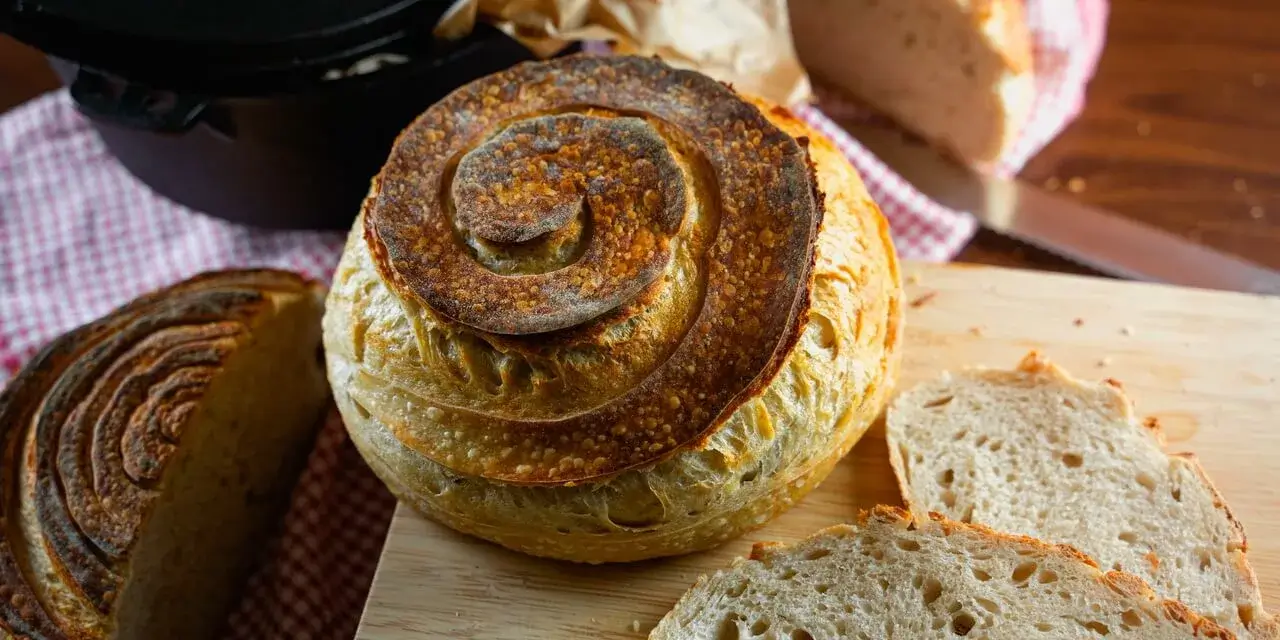
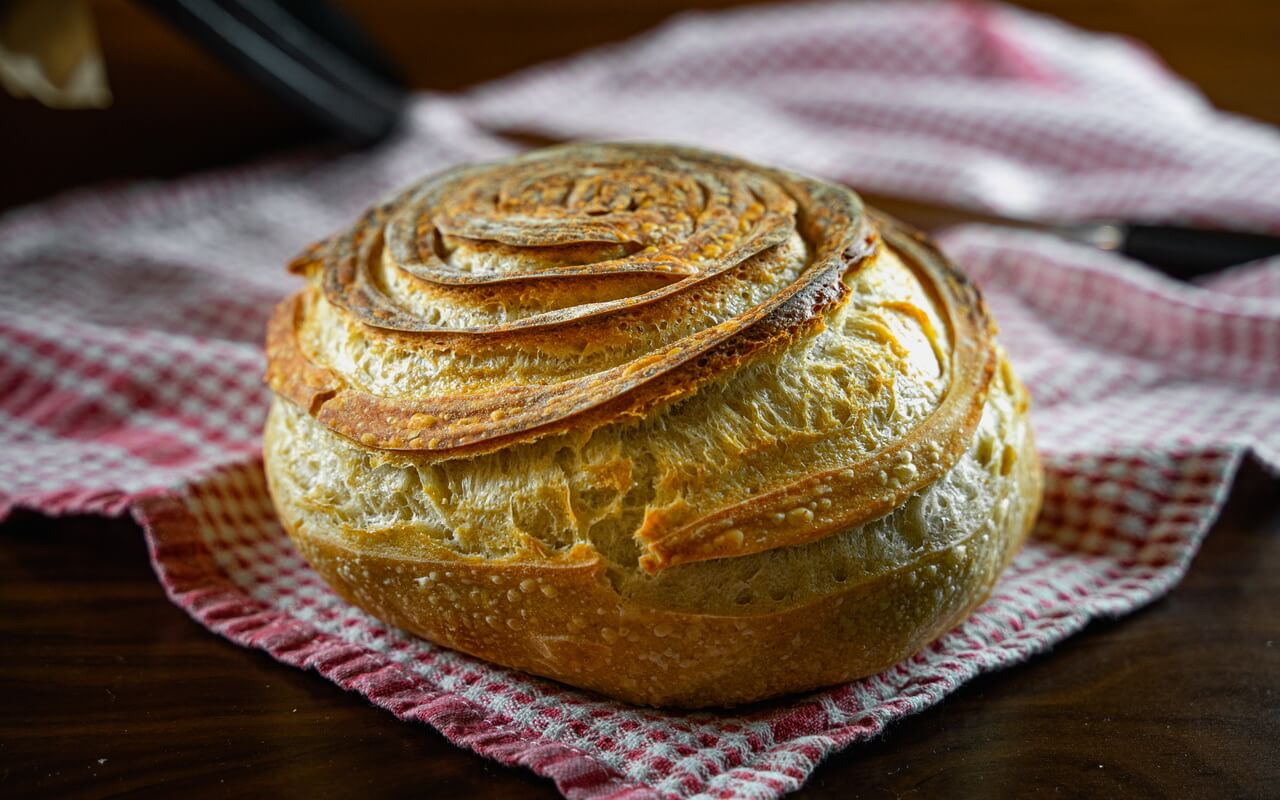
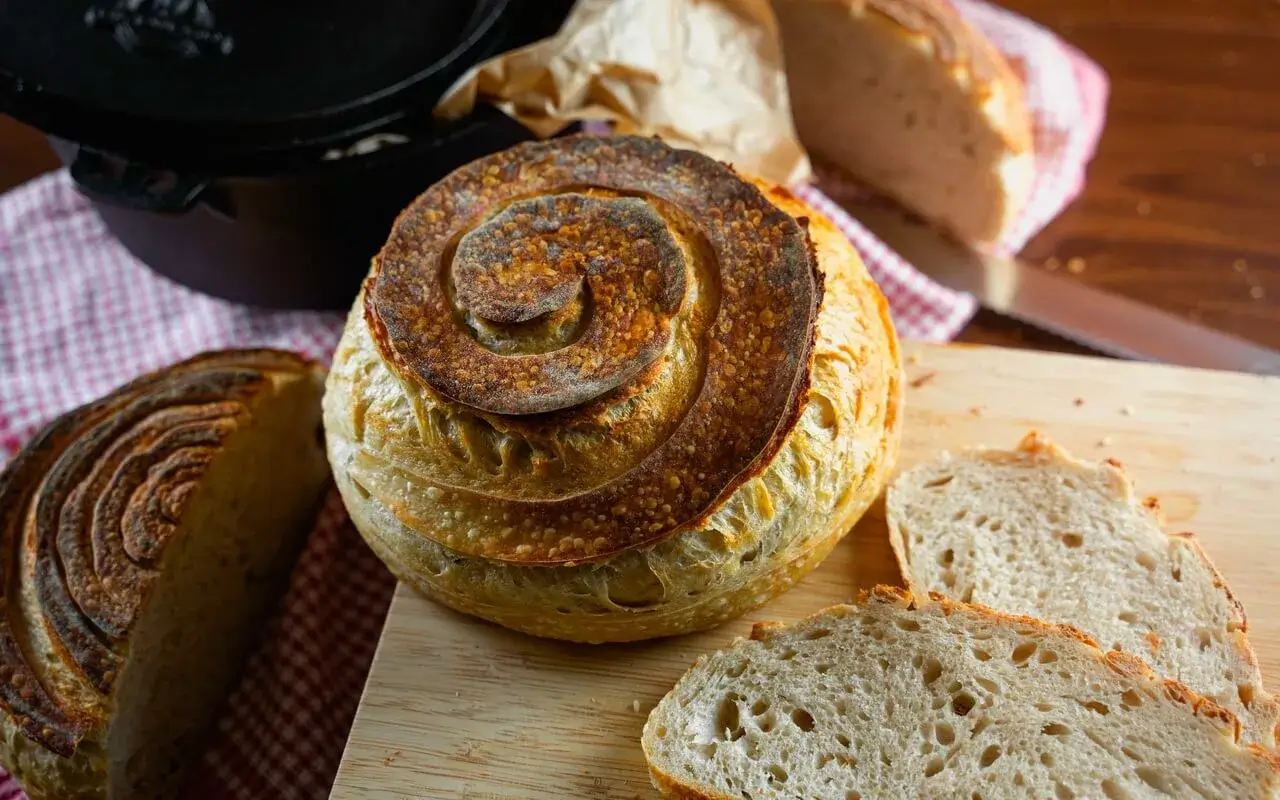
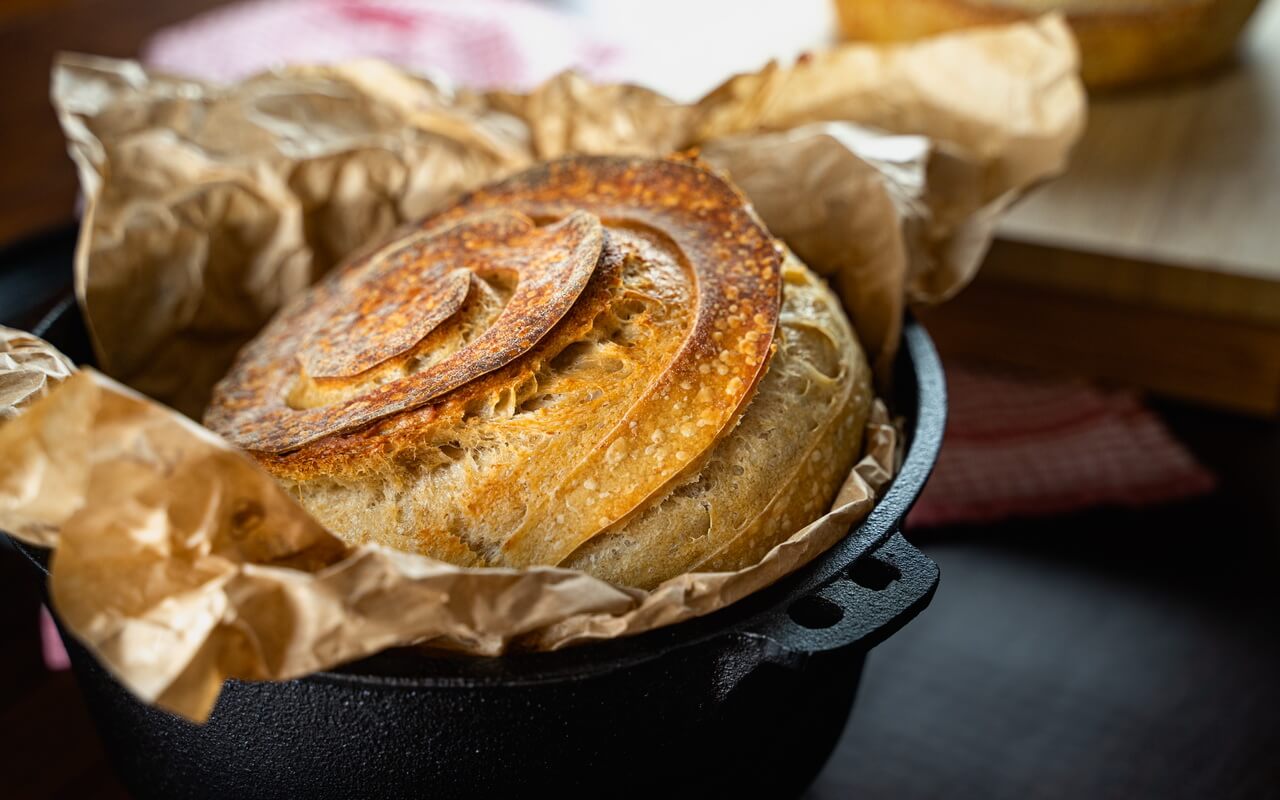
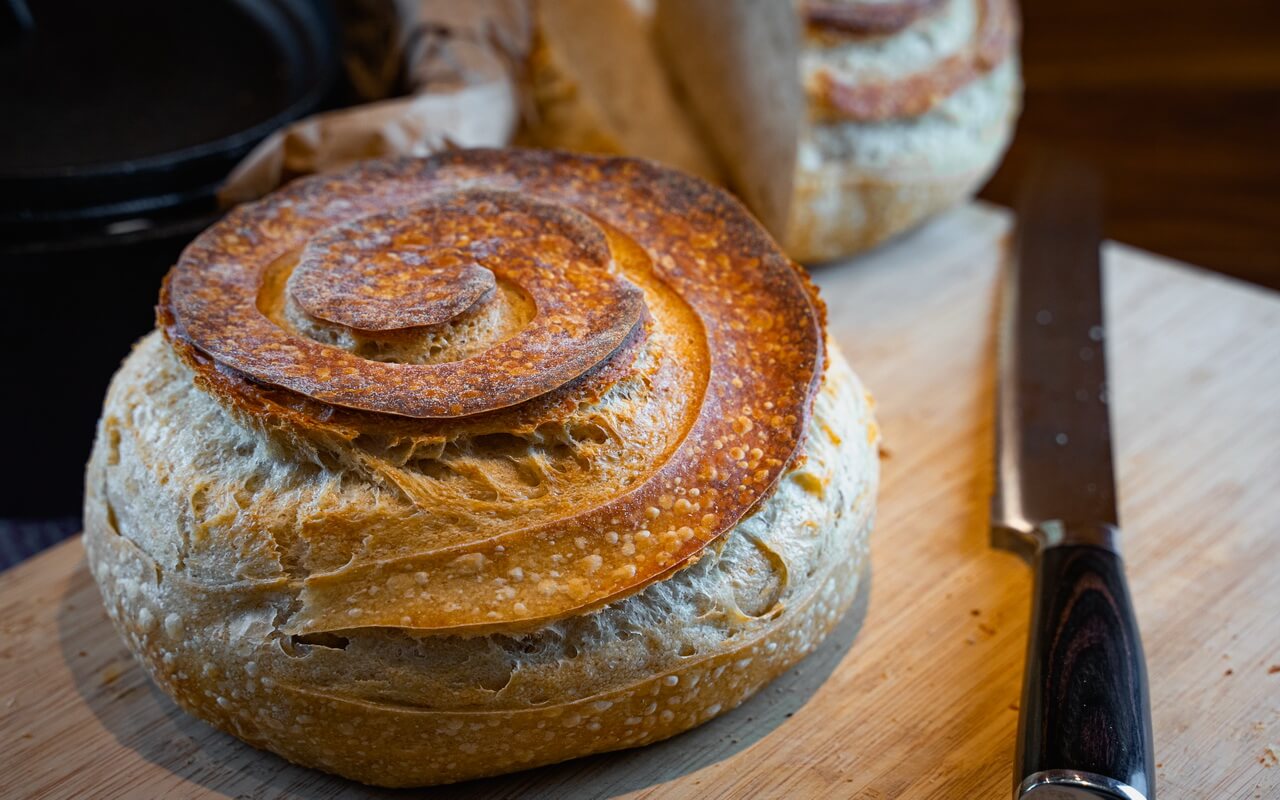
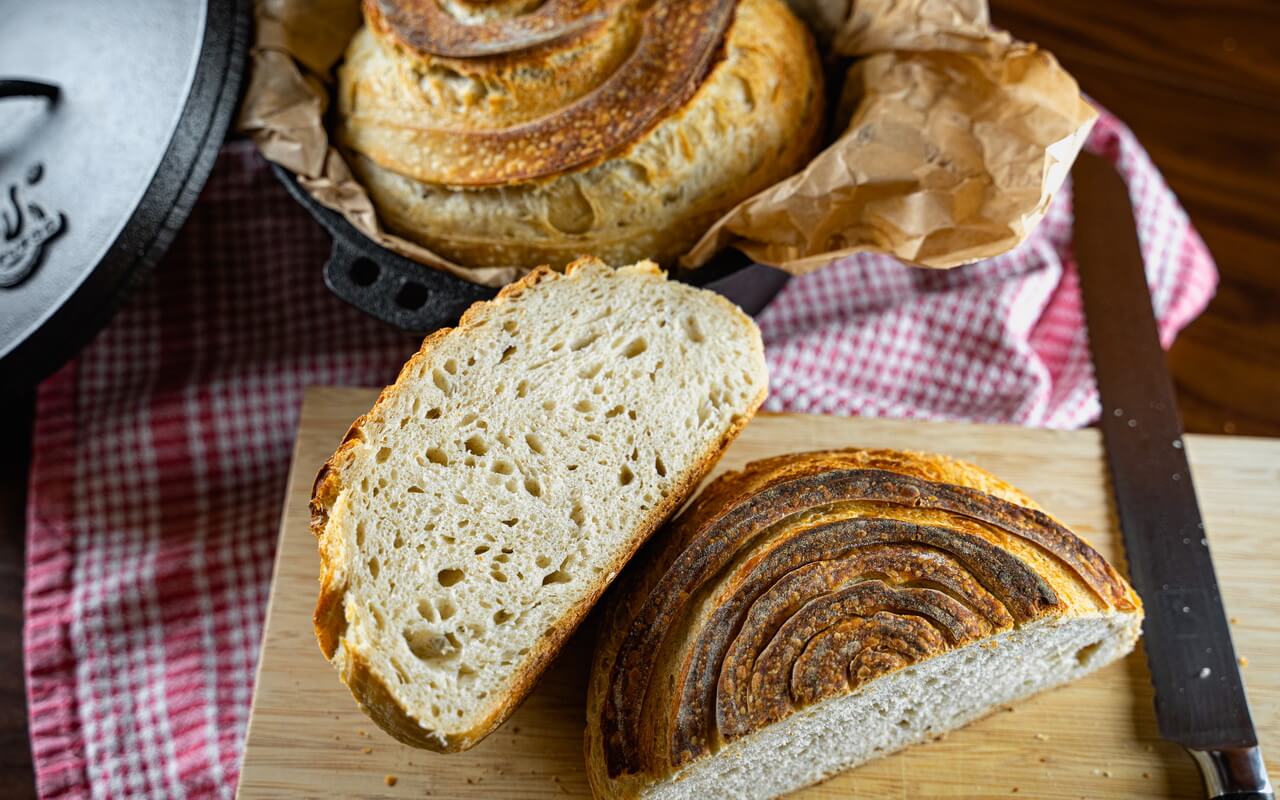
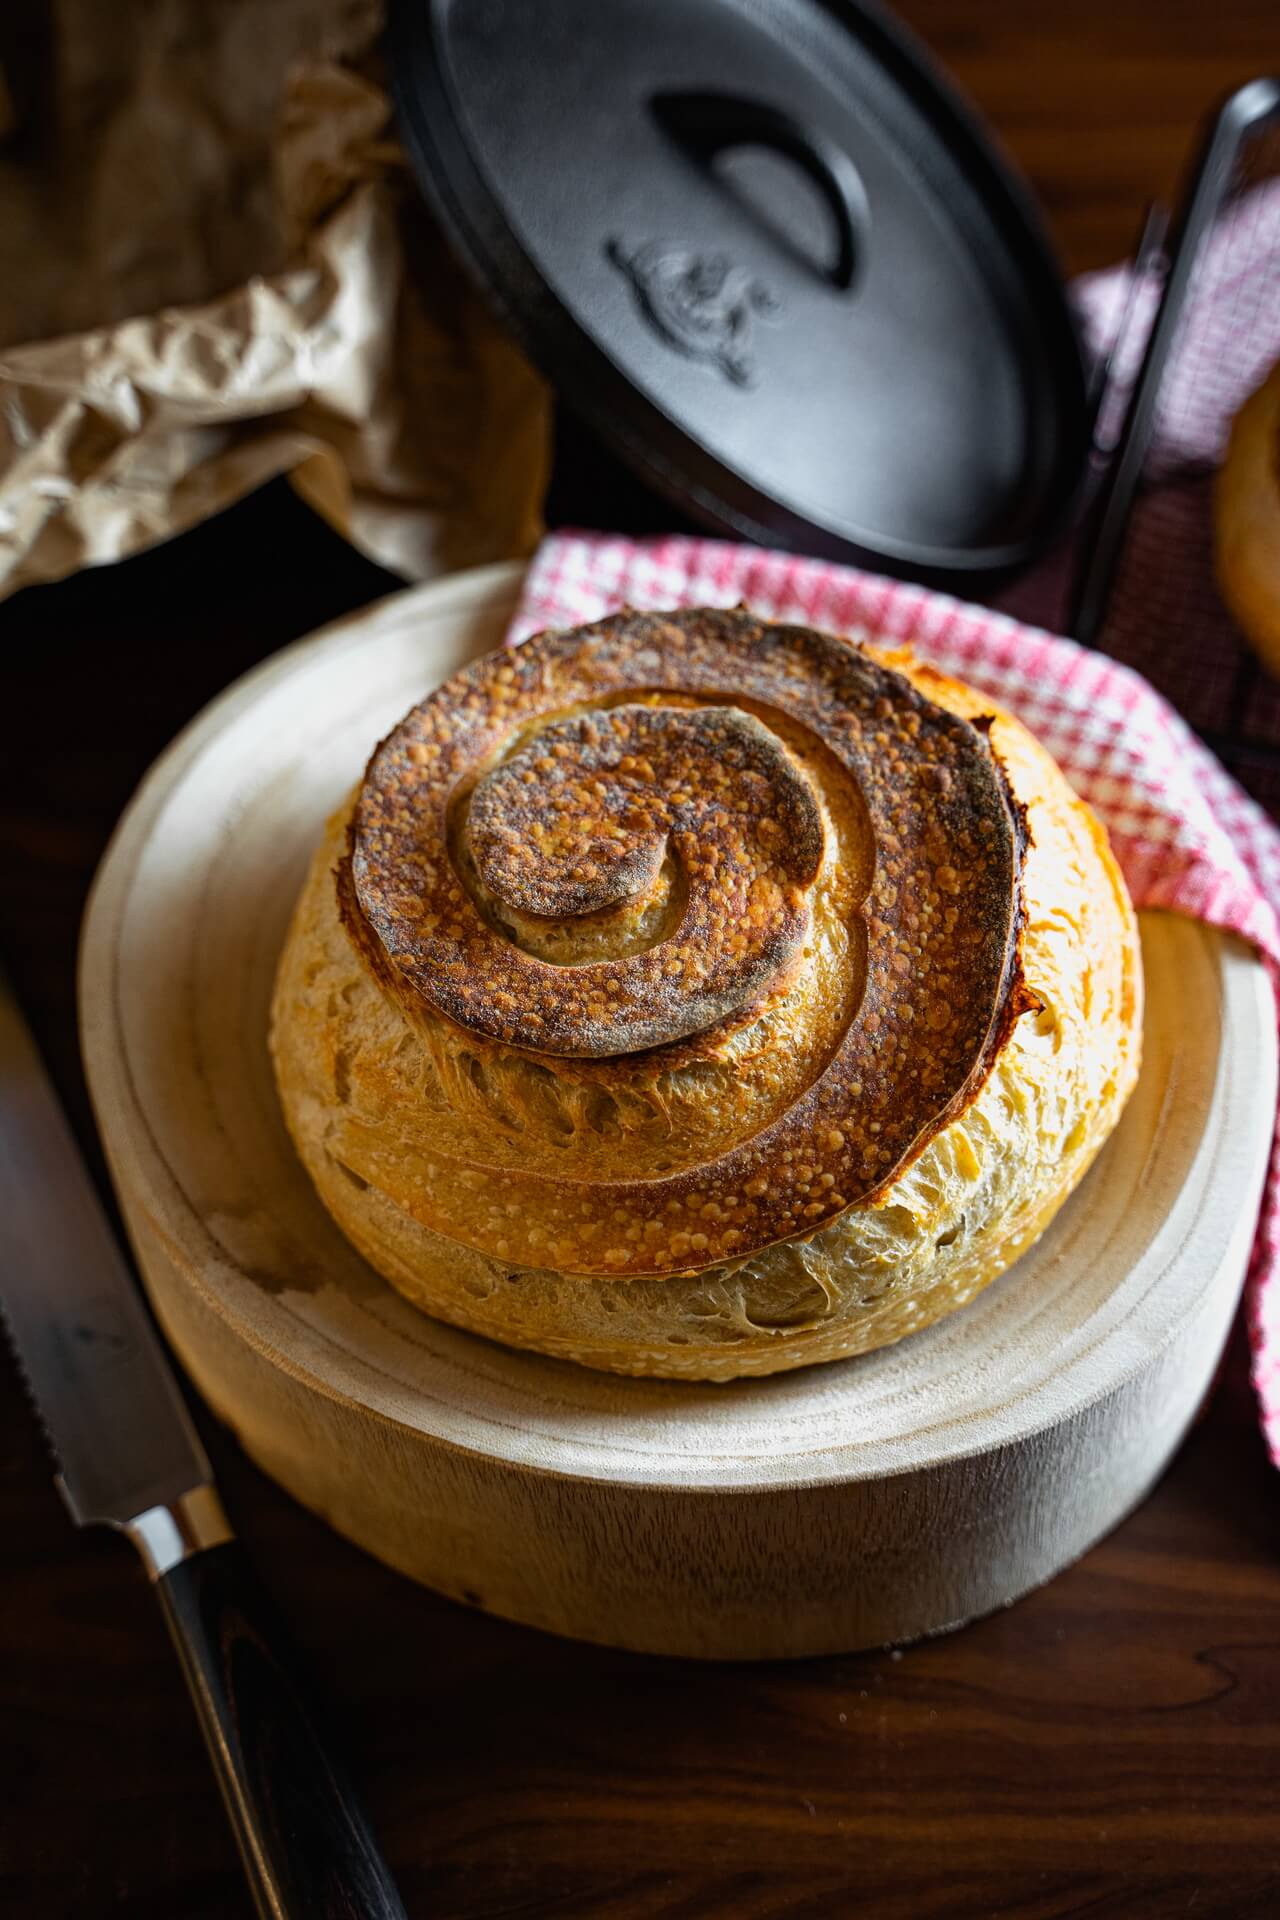
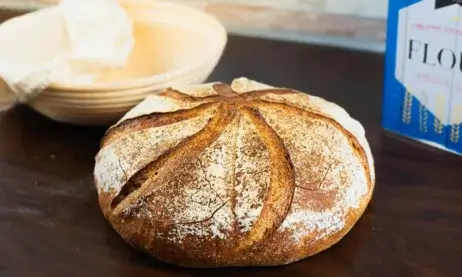
This super delicious sourdough bread with 60% hydration doesn’t only look good, it also tastes fantastic. As you can see from the pictures, we played around a little with the look this time.
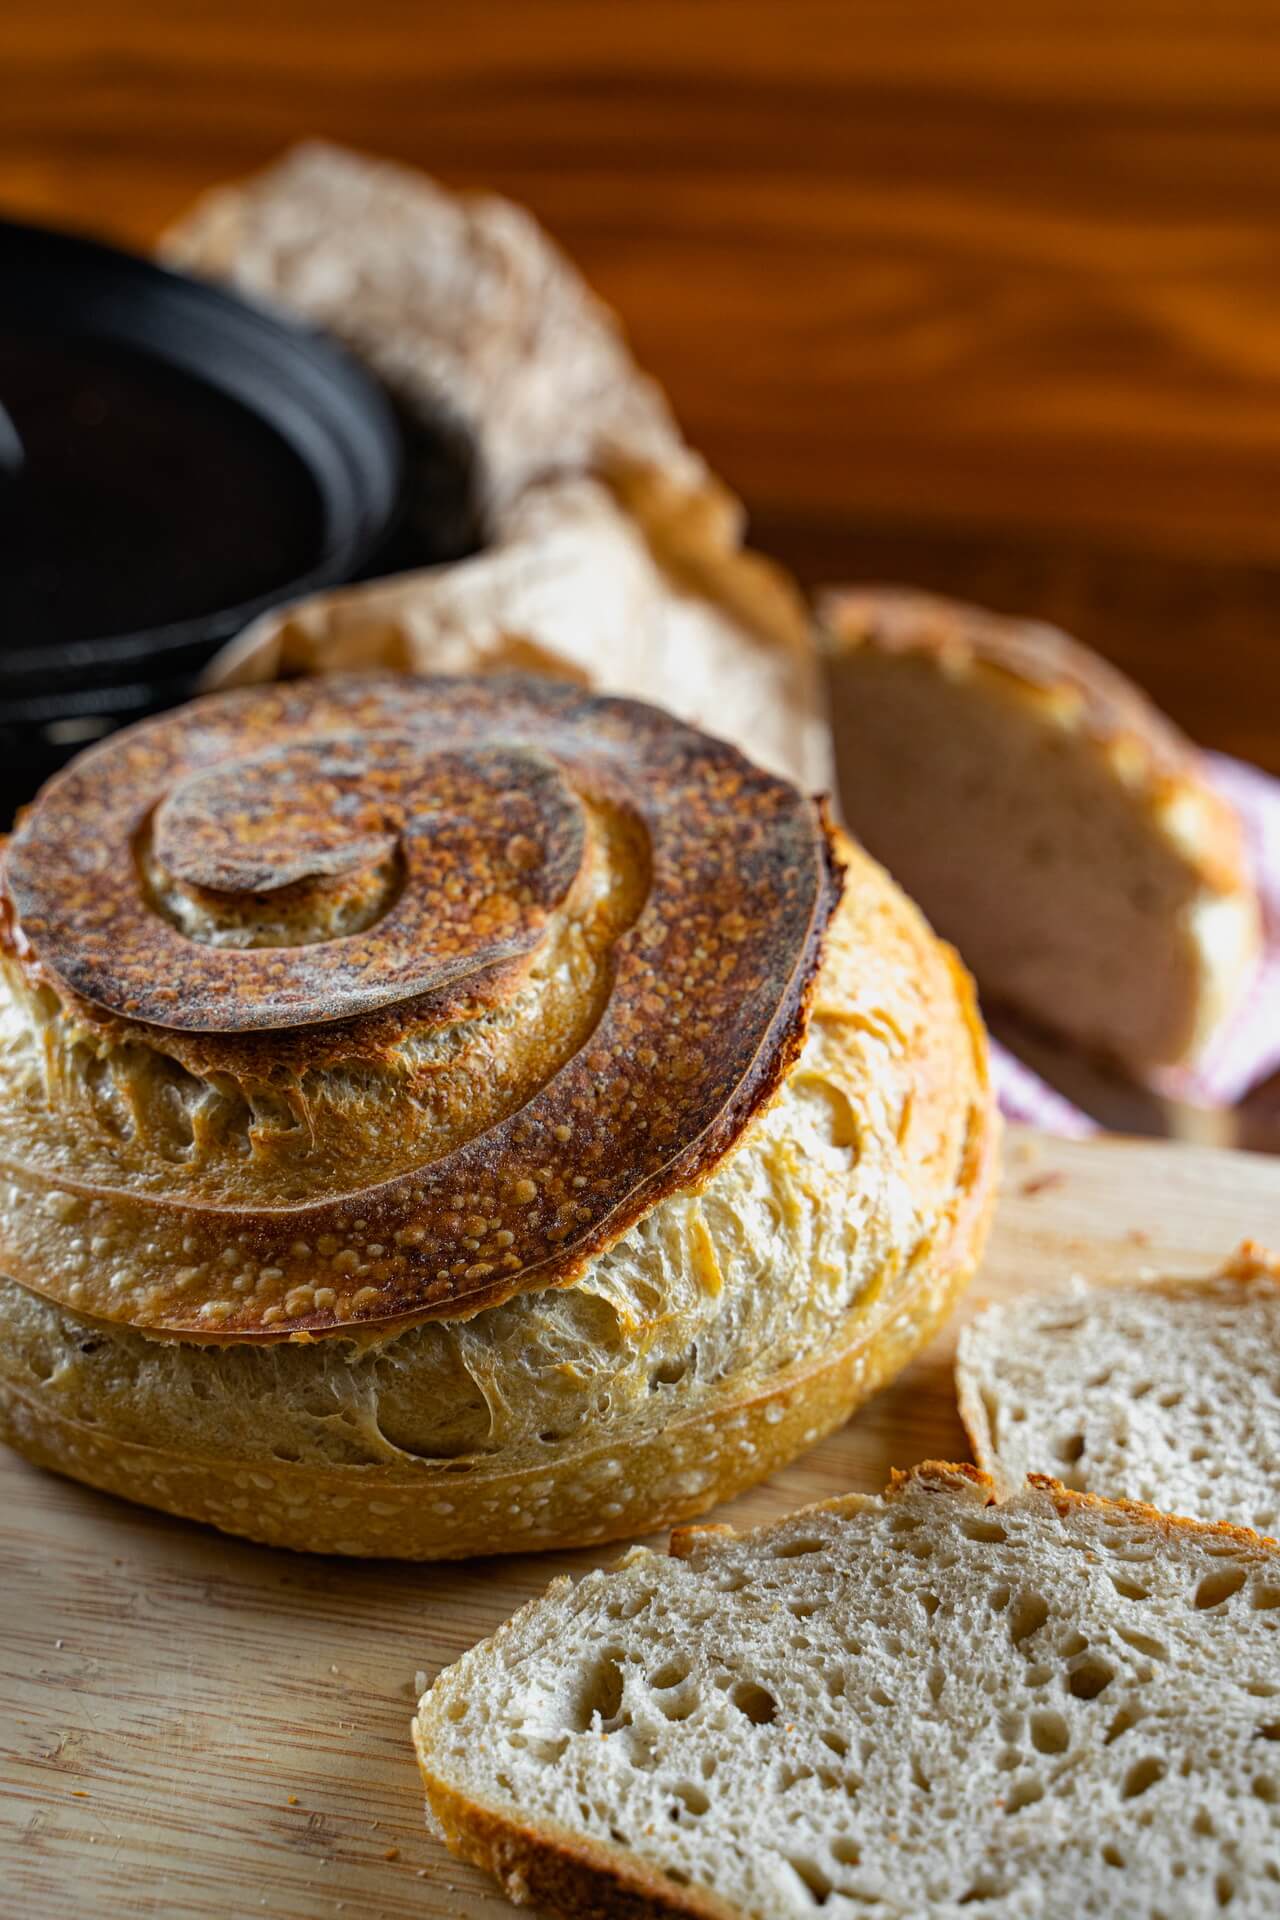
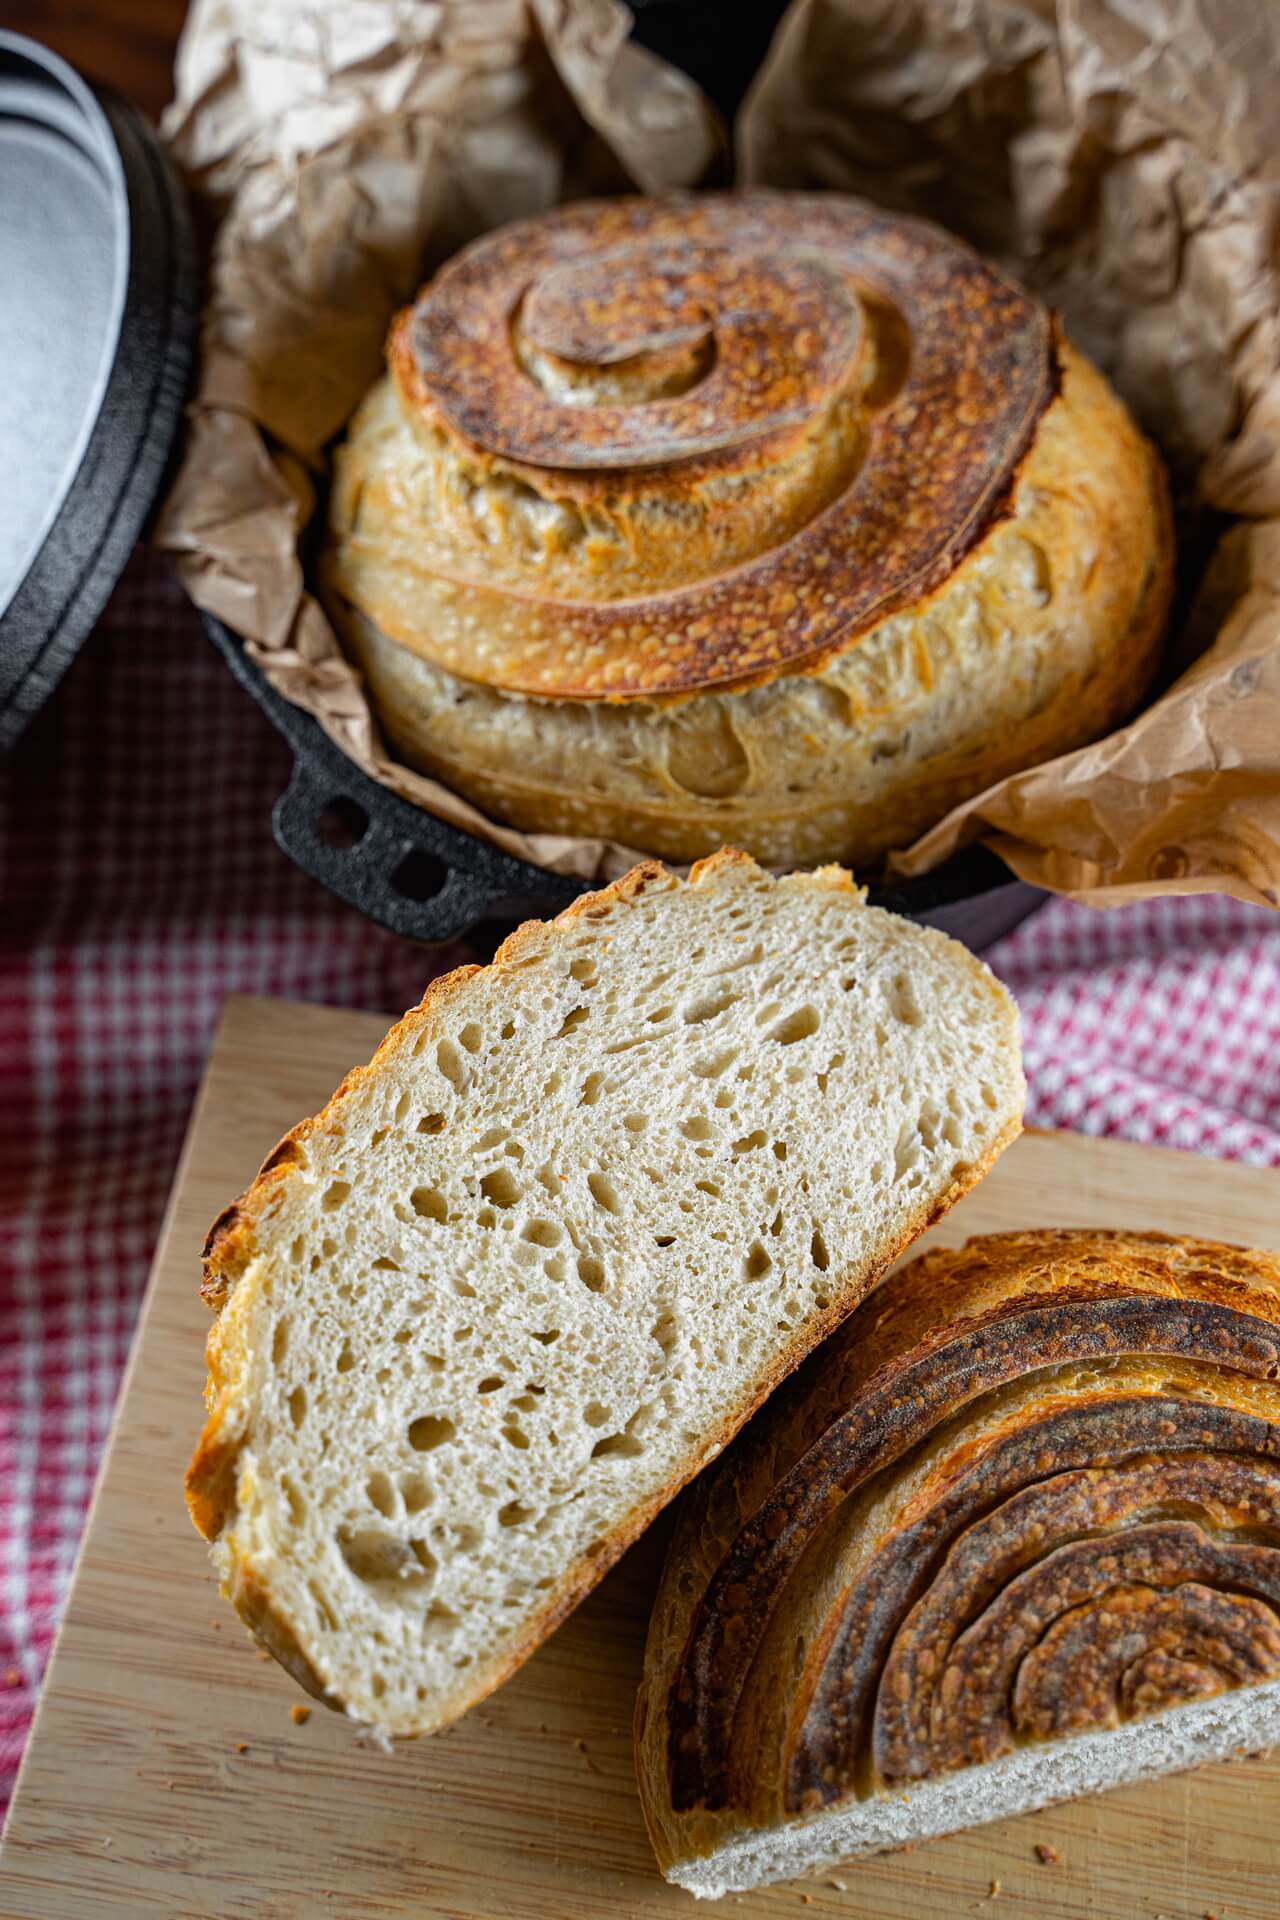
Rather than cutting it in the middle, we went for a spiral shape this time.
The result reminds of a rose so you don’t only have a very delicious bread but also a good looking one too!
Things to know before you start
Time Schedule
| Steps | Work time | Waiting time |
| Mix | ~15 minutes | – |
| Bulk Fermentation, Stretch & Fold | ~10 minutes | 2,5 hours |
| Pre-shape | ~5 minutes | 15 minutes |
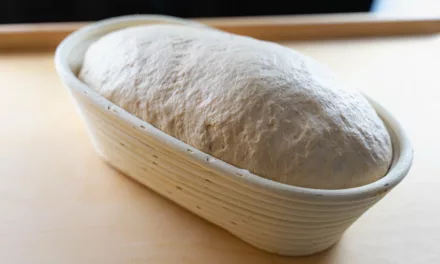
| Shape | ~5 minutes | – |
| Proof | – | 10-12 hours |
| Score | ~5 minutes | – |
| Bake | ~5 minutes | 40-45 minutes |
| Cool | – | 2 hours |
After about 16 to 18 hours you will have a super tasty sourdough bread with 60% hydration just made of flour, water and salt.
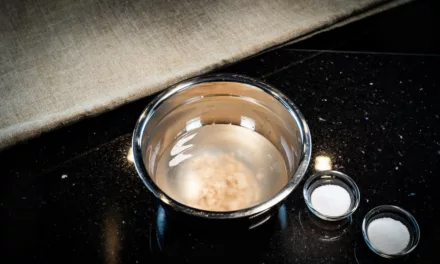
Total ingredients
| Weight | Ingredient |
| 175 g | Mature sourdough starter – From whole wheat flour |
| 450 g | All-purpose flour |
| 10 g | Salt |
| 1 g | Yeast – Fresh (optional) |
| 235 g | Water |
You will have a dough of about 870 g in total.
Make sure to have a mature sourdough starter that is active and healthy. If you think your starter is not, then you can add 1 g of fresh yeast to help with the rise.
Difficulty
As the hydration level is at 60% only, the dough is very easy to handle and process. Therefore it can be categorized as a simple recipe.
You can have a look at our sourdough bread for beginners recipe that contains a lot of details for the different steps used here.
Baking tools
A round banneton proofing basket is needed in order to get the sourdough bread in a good round shape and a dutch oven. You can also have a look at our should have baking tools to find some more baking tools we are constantly using.
Steps
1. Mix
| Weight | Ingredient |
| 175 g | Mature sourdough starter – From whole wheat flour |
| 450 g | All-purpose flour |
| 10 g | Salt |
| 1 g | Yeast – Fresh (optional) |
| 235 g | Water – 24°C (75,2°F) |
- Mix all of the mentioned ingredients in a stand mixer for 5 minutes on speed level one and 7 minutes on speed level two
- The dough should be smooth and elastic after mixing and not stick to the bowl a lot
2. Bulk Fermentation, Stretch & Fold
- Cover the dough and let it rest for a total of 2,5 hours at 20-22°C (68-71,6°F)
- During that time stretch & fold the dough every 30 minutes (3 times in total) and after the 3rd time, let it ferment further for 1 hour until 2,5 hours are reached in total
- After each stretch and fold put it back to the bowl and cover it again so it doesn’t dry out
3. Pre-shape
- Get the dough in shape by roughly rounding it
- Afterwards look for a dry spot on your surface and flour it lightly
- Transfer the pre-shaped dough ball on the floured surface
- Cover it with a towel and let it rest for 15 minutes
- Tip: If you realize that the dough starts sticking to your hand or bench knife, just clean the bench knife of any dough and flour it a bit again
4. Shape
- Get the dough in the final shape by rounding it again
5. Proof
- Dust your proofing basket with all-purpose flour
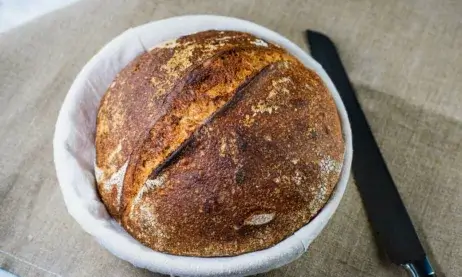
- Put your previously shaped dough seam-side-up in the dusted proofing basket and cover it
- Let it proof for 10 to 12 hours in the fridge at 5°C (41°F)
6. SCORE
- Cover a pizza peel with parchment paper
- Take your proofed dough out of the fridge
- Gently take your dough out of the proofing basket by flipping it upside down on the pizza peel
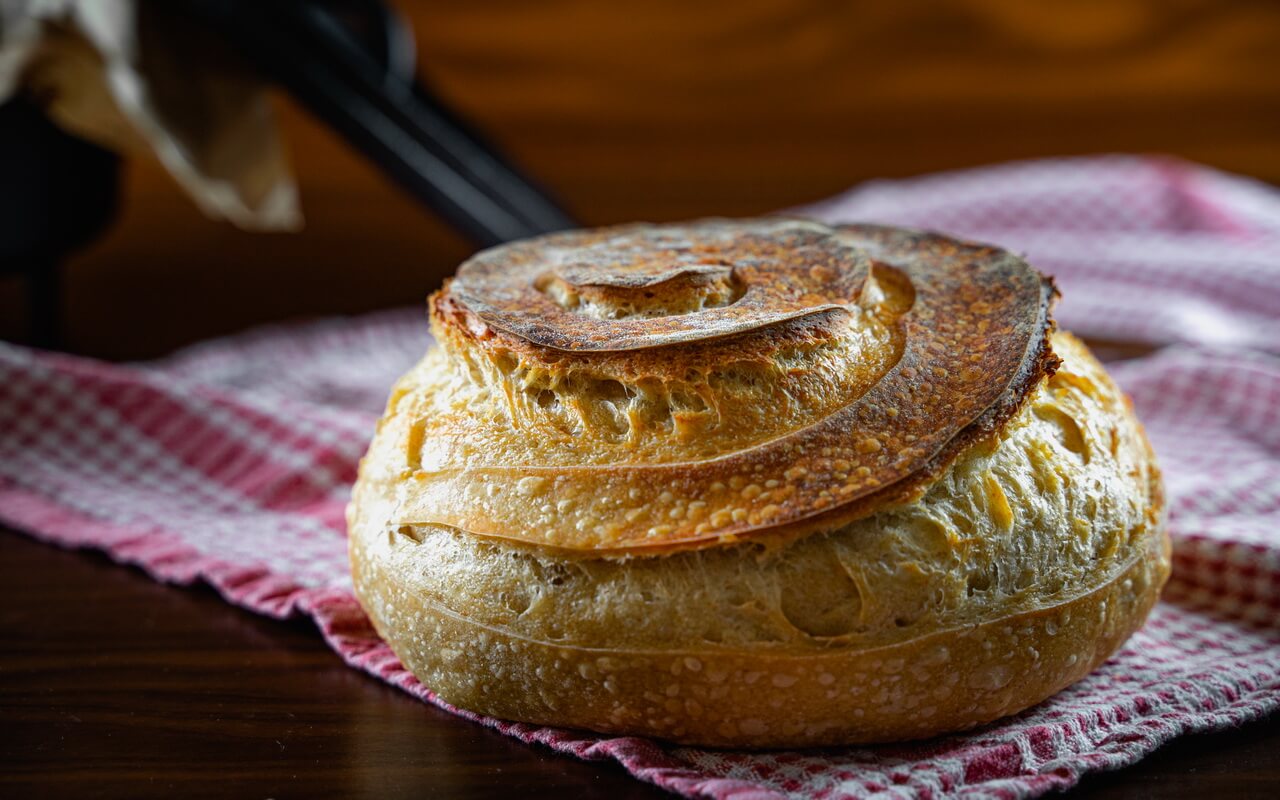
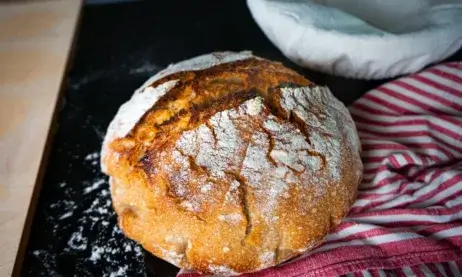
- This time we are going for a spiral-shaped cut
- Place your bread lame on top of the dough starting in the center and then cutting outwardly (about 2 cm deep) creating a spiral shape
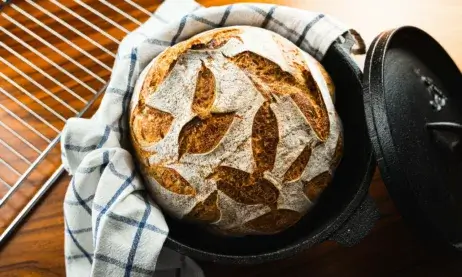
- In the following images you can see the difference between making a narrow and a wide spiral
7. Bake
- Place your dutch oven with the lid on top in the oven and preheat to 260°C (500°F) for ~45 minutes with the upper and lower heat function
- Remove the lid of the dutch oven (use oven mitts so you don’t burn your hands!), place the dough inside and seal it again with the lid and bake for 40 to 45 minutes
- After 20 minutes, lower the temperature to 220°C (428°F) and remove the lid from the dutch oven so you get a nice crust on top
8. Cool
- Let your sourdough bread cool for 2 hours on some kind of grid
Conclusion
Crust
This lovely sourdough bread has a very nice appearance due to the way the dough was scored. We went for a spiral this time and the result somehow reminds of a rose. Thanks to the way the crust cracked, it also has different shades of brown. It has a nicely crunchy crust with roast aromas which makes it taste even better.Crumb
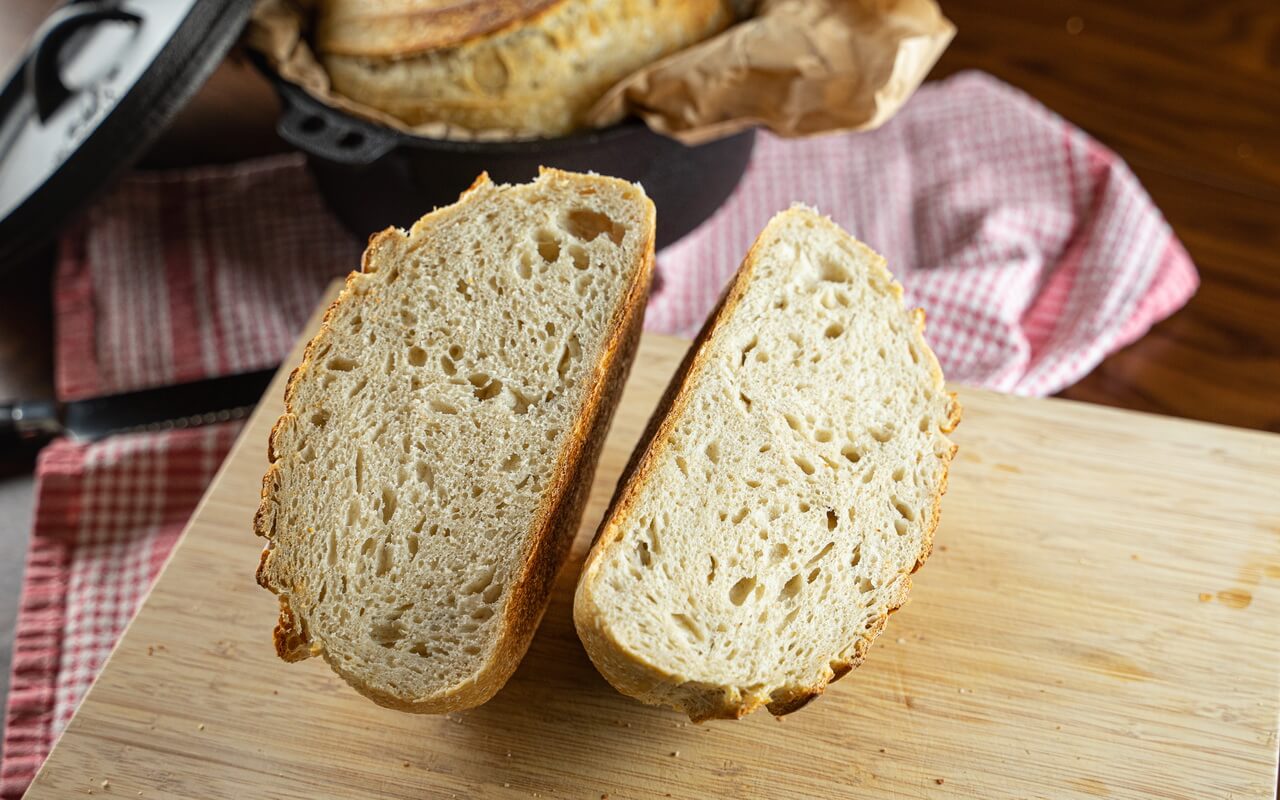
The crumb, in contrast to the crust, is soft but firm and has a mild taste. In general, this one has very even big and small pores.Taste
As already mentioned under the previous point, the taste of this sourdough bread is mild. Thanks to the different tastes in crust and crumb, the overall impression gives a full flavoured picture. It is also very balanced and while you can taste that the bread was made with sourdough, there is only a little acidity in the taste and not leading.Goes good with
We enjoyed this beautiful sourdough bread with cold cuts or just butter with salt. Of course, it is entirely up to you how you enjoy it but as it is very versatile, it goes well with almost everything.Gallery


Hi, I am curious about how the hydration (60%) in this recipe is calculated. Hydration is: liquid/flour.
If I take 235 water/450 flour= 52%. I guess the starter also involved , but how? (the starter is half flour and half liquid), so how is that taken in the calculation??
Thanks in advance for your answer.
Peter
Hi Peter,
if not mentioned, all of our starters have a hydration level of 100%.
– Formula: Liquid / Flour * 100 = Hydration
– Example: A dough with 1000 g flour and 600 g water has a hydration of 60%.
So in this recipe we got 175 g sourdough starter = 87,5 g flour and 87,5 g water and we add 450 g all-purpose flour and 235 g of water.
That would be: 322,5 g water / 537,5 g flour * 100 = 60% hydration.
I hope that helped you 🙂
If you don’t use the yeast, how long do you bulk ferment for? 2.5 hrs isn’t enough.